As to be expected on the hottest day of the year, there were fewer customers than usual, which was just as well, with only 5 repairers.
11 customers (all arriving early) brought in 17 items to be examined. (Another one did not want to wait and said she would return in Sept)
3 items were not repairable, leaving 14 items/problems repaired/solved.
Nev, on his own, examined 8 items and repaired 5: radio, alarm clock, Dyson vacuum, vacuum cleaner and uplighter.
Our 3 sewing experts were also kept busy with 7 items: the hem of a dress and a teddy full of holes plus 5 clothing items for one lucky customer!
Another customer was present for the whole time while Nev fixed his alarm clock and Vicky thoroughly cleaned his remote control and then spent time freeing up storage on his computer. We were not able to check if the remote control was working as of yet but hope that the deep clean of the circuit board and buttons does the trick and buttons will be more responsive.
Thanks again to all our volunteer repairers who helped out at this event in the heat.
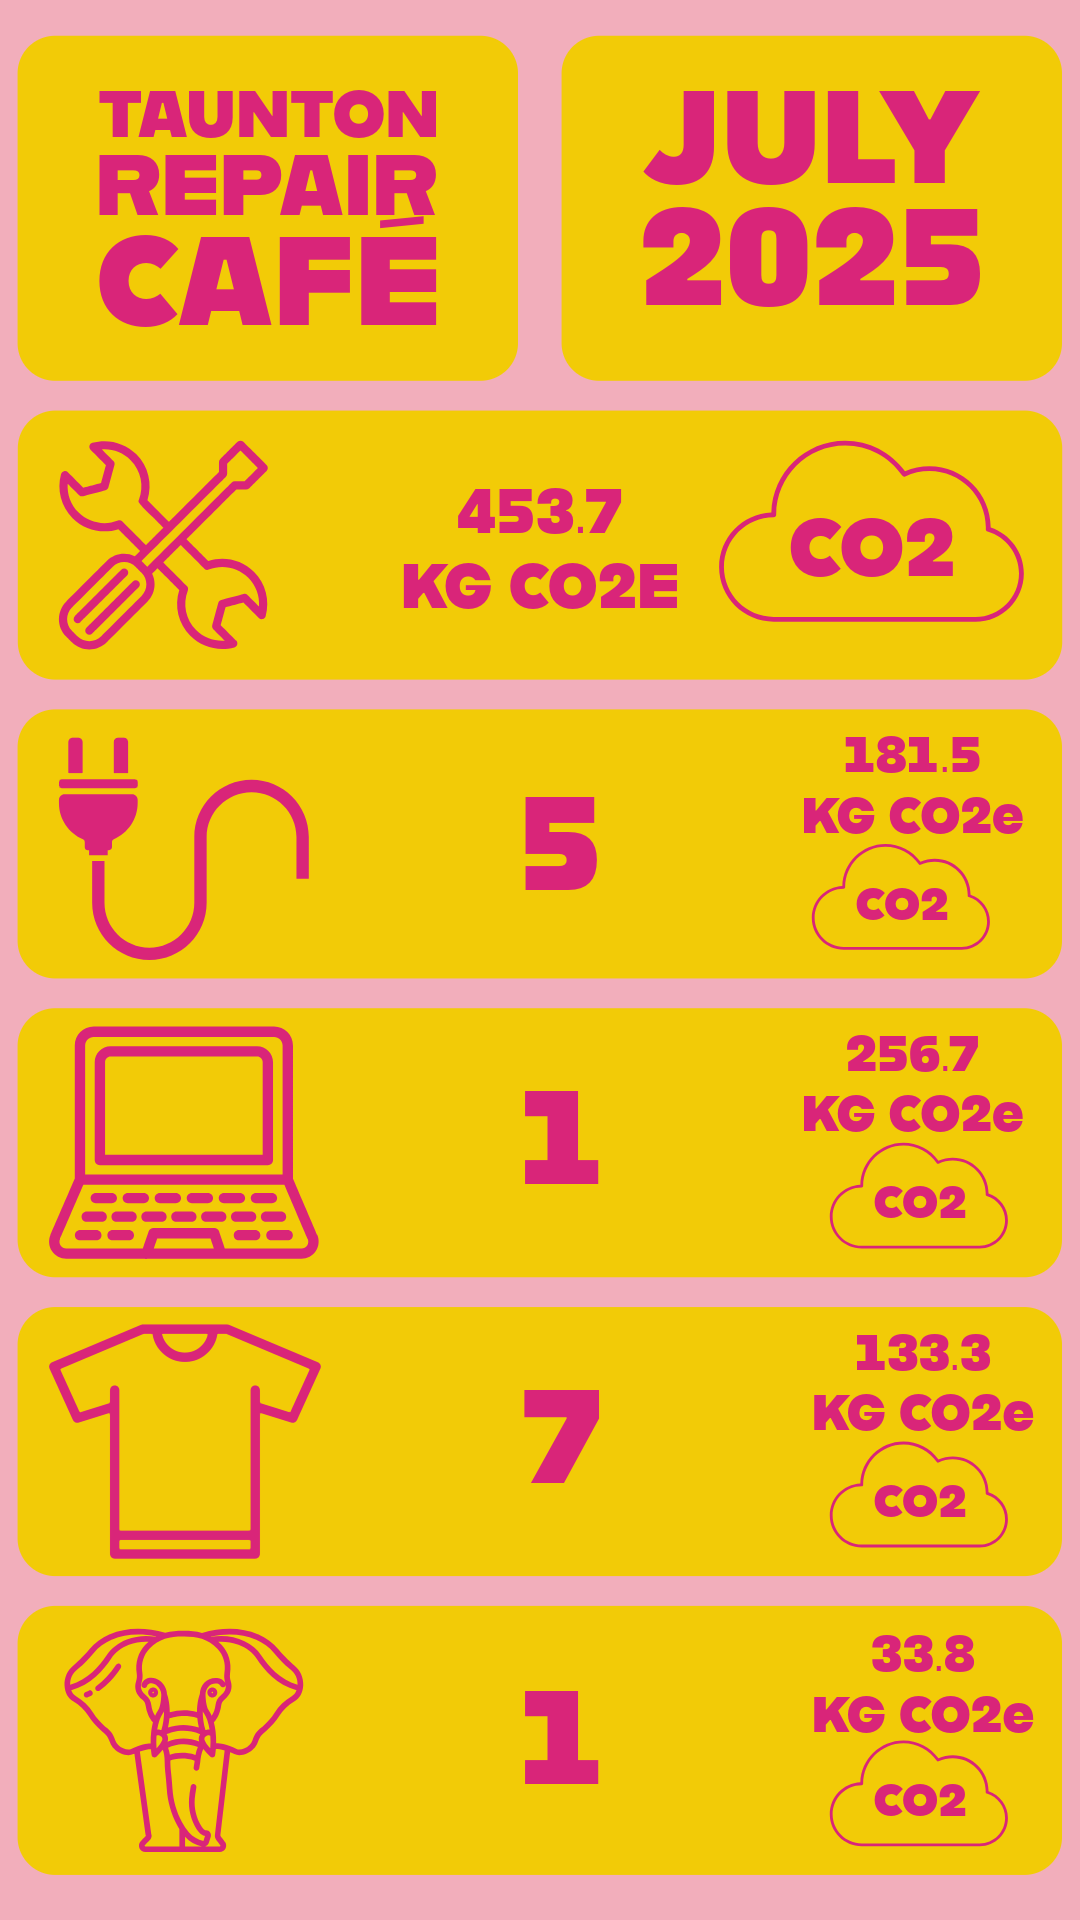
We have used the Repair Café Carbon Calculator once again developed by Steve Privett, Professor Martin Charter of Farnham Repair Café and the University for the Creative Arts (UCA) which calculates the KG of CO2 saved by repairing each item.
Fixing Non-Working Buttons on Remote Control
I thought I would do a deep dive into how to fix a remote control that has buttons that are not working. Using the excellent website instructables.com I found a how to on how to get buttons working – https://www.instructables.com/Fixing-Non-Working-Buttons-of-Any-Remote-Control/
It was an easy step by step process with only simple tools to solve the problem. The difficult part is getting into the remote control.
Tools Needed:
- small screwdriver (probably a philips screwhead)
- small flat head screwdriver to help prise apart the remote
- cotton wool swabs
- isopropanal alcohol (for cleaning electronics) – can easily be ordered online
Once you have prised the remote control apart just may a note or take a photo of how the device is put together for easy re-assembly.
Check the circuit board and use the cotton wool swabs and isopropanal alcohol to gently clean the circuit board focusing on the areas where the buttons are not working. Clean the back of the buttons as well and ensure there is not grime accumulated there.
Carefully put back together and screw back together.
That should fix the problem. The Instructables article goes on with a suggestion if the buttons still do not work.
